


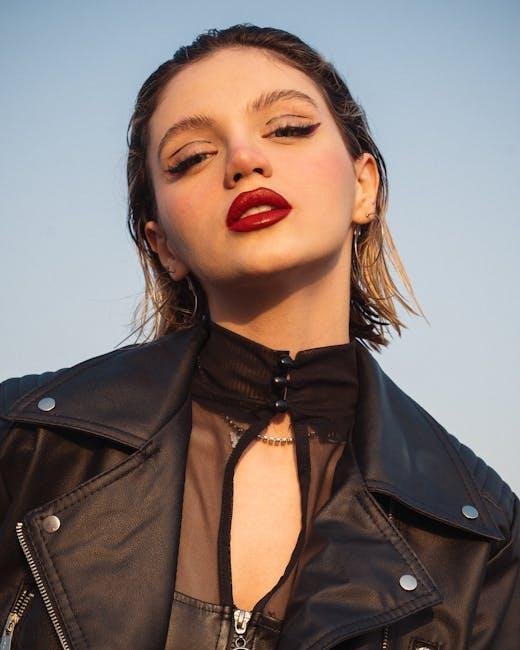
How to Do winged Eyeliner Like a Pro: A Step-By-Step Guide
In the world of makeup, few looks are as iconic and transformative as winged eyeliner. This timeless technique, characterized by its bold, elongated flicks at the outer corners of the eyes, has been gracing runways and red carpets for decades. Whether you’re aiming for a subtle enhancement or a dramatic cat-eye, mastering the art of winged eyeliner can elevate your beauty game to new heights. Though, achieving that perfect balance of symmetry and finesse can frequently enough feel like an elusive dream. Fear not! In this article, we’ll unveil the secrets, tips, and techniques that will empower you to create stunning winged eyeliner with confidence.Get ready to discover how to transform your everyday look into a captivating statement with just a flick of your wrist. The journey to eye-catching allure begins here!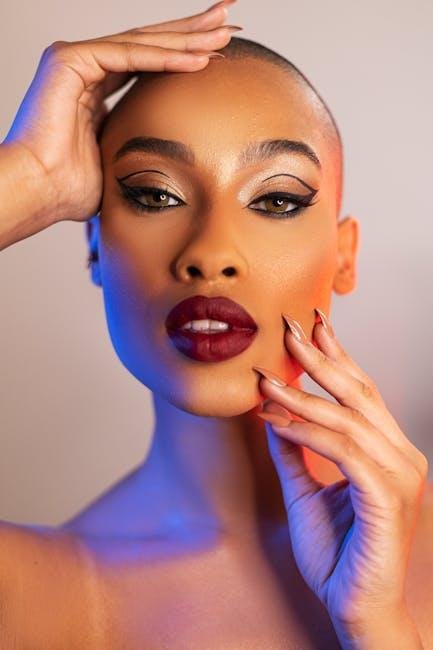
Mastering the Perfect Angle for Your Winged Eyeliner
To achieve that enviable winged eyeliner, it’s all about finding the right angle. Start by determining the point where your wing will extend outward. A good rule of thumb is to align the wing with the outer corner of your eye and draw an imaginary line towards the end of your brow. This will provide a natural lift to your look. Consider experimenting with different angles before committing to a final style. Tips for finding your perfect angle:
- Use a pencil to sketch a guide before applying liquid liner.
- Try holding your eyeliner brush at a 45-degree angle for sharp precision.
- Practice with tape as a guide for cleaner lines.
Onc you’ve sketched out the wing, it’s time to fill it in. Ensure that the base of the wing is seamlessly connected to your upper lash line.the thickness of the wing can vary based on personal preference, but keeping it proportional to your eyes is essential. For a bolder look, go slightly wider at the base and taper it off towards the tip. Additionally, consider the following:
| Wing Style | Best For |
|---|---|
| Cat eye | Almond-shaped eyes |
| Retro Flick | Round eyes |
| Soft Wing | Everyday wear |

essential Tools and Products for Flawless Application
Achieving the perfect winged eyeliner look requires the right tools in your makeup arsenal. Start with a high-quality eyeliner that suits your style. Whether you prefer gel, liquid, or pencil, each has its unique texture and finish. Here are some options to consider:
- Gel liners – Great for a smooth application and long-lasting wear.
- Liquid Liners – Ideal for a sharp, defined wing with a glossy finish.
- Pencil Liners – Perfect for beginners, offering control and ease of use.
to enhance the precision of your application, invest in tools like angled brushes or felt-tip pens for more control. Additionally, setting your eyeliner with a translucent powder can help it stay put throughout the day. Here’s a speedy overview of some must-have products:
| Product | Type | Benefits |
|---|---|---|
| Maybelline Eye studio Gel Eyeliner | Gel | Buildable coverage, waterproof formula. |
| Stila Stay All Day Waterproof Liquid Eyeliner | Liquid | Long-lasting, precise felt-tip. |
| Urban Decay 24/7 Glide-On Eye Pencil | Pencil | Creamy texture, rich color payoff. |
Step-by-Step techniques for Achieving Precision
achieving flawless winged eyeliner requires a steady hand and a few clever techniques.Start by gathering your tools:
- Liquid eyeliner for a sharp, defined line
- Pencil or gel eyeliner for a softer finish
- Small angled brush for blending and correction
- Scotch tape to create a crisp edge
- Q-tips dipped in makeup remover for touch-ups
Begin by placing a piece of tape at the outer corners of your eyes, angling it towards your brow. This will act as a guideline, ensuring uniformity on both sides. Next, gently draw the wing starting from the corner of your eye, extending it towards the tape. Fill in the line toward the inner corner, gradually thickening it as you move to achieve your desired look.
For those who prefer a less dramatic wing,consider the following tips to perfect your application:
- Use short,feather-like strokes for control
- Keep your eye slightly open to judge the full effect
- Begin with a thin line and build up as needed
- Close your application with a quick flick or triangle at the end
To maintain symmetry,frequently check your alignment by looking in the mirror from different angles. If you mess up, don’t panic; use your small angled brush to soften or reshape any mishaps. With patience and practice, you’ll soon achieve that enviable winged look that lasts throughout the day.
Tips and Tricks for Long-Lasting Winged Eyeliner
To ensure your winged eyeliner lasts all day and stays pristine, start with a solid base. Eye primer can work wonders by smoothing the eyelid surface and providing a sticky base for your liner. Here are some essential tips to help your eyeliner stand the test of time:
- Choose the right formula: Gel and liquid liners are ideal for longevity, while pencil liners may smudge over time.
- Set with powder: Dust a translucent setting powder or a matching eyeshadow over your eyeliner to lock it in place.
- Use a fine-tipped brush: For gel liners, a fine brush allows for precision and reduces the risk of smudging.
Another game-changer for maintaining your winged eyeliner is the technique used during application. Practicing your application can lead to perfecting the look, but these strategies can elevate your game:
- Draw a guide: Lightly sketch the wing with an eye pencil before going in with a liquid or gel liner.
- Layer for depth: Apply an initial line, allow it to dry, then add a second layer to intensify the color.
- Finish with setting spray: A quick spritz can help your makeup endure through the day while ensuring your wings remain crisp.
Closing Remarks
As we conclude our journey through the art of winged eyeliner, remember that practice is the key to mastery. Whether you opt for a bold, dramatic flick or a subtle, soft line, the beauty of this technique lies in its versatility.Embrace your unique style and don’t be afraid to experiment with different tools and products until you find what works best for you. With patience and perseverance, you’ll soon be able to create wings that elevate any look.
So go ahead, grab your eyeliner, and let your creativity take flight.After all, every masterpiece begins with a single stroke. Happy lining!

